Monday, May 26, 2014

Sorry for not publishing for a while

It has been a week or so, maybe two that I have not published anything. This was because I found myself selecting and reproducing photographs. This was due to the fact that I am part of a photographic group that is turning LX (60) years old. To celebrate this accomplishment we decided to mount an exposition of photographs that has been donated trough the years or left because they were part of past exhibitions.

To give you a little bit more of context, the association is called Foto Club Ingenieros (Engineers Photo Club), it was founded on 1954 to teach to the students photography, it started in the former building were the Engineering school held lessons, when the Universidad Nacional Autónoma de México (UNAM), unified in a single campus in the southern zone of Mexico City, the Club then moved with the school to its nowadays location. At that time, only analogue photography existed. But that tradition is still taught in our complex.

To commemorate our LX Anniversary we are going to held and exposition of our historical archive in the same building where our Club was founded. If someone is planning to visit Mexico City by august trough september we cordially invite you to the exhibition at Palacio de Minería, Tacuba street #5, at downtown Mexico City, near the Fine Artes building and the Allende subway station.

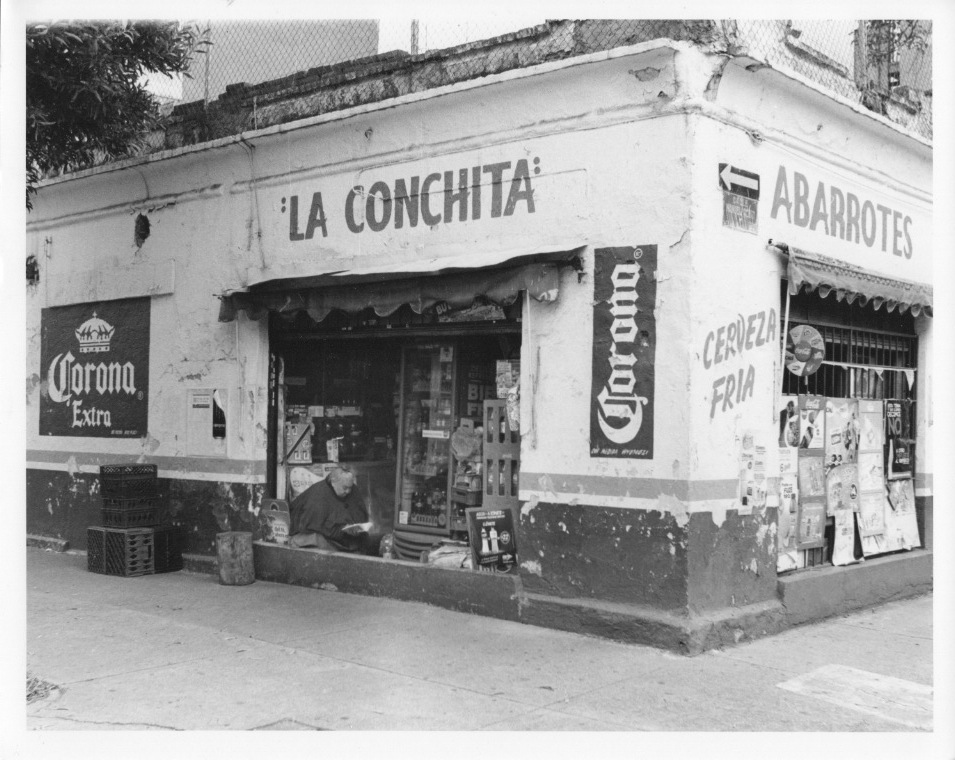
I leave you with an image that is going to be part of the exhibition.


Soon I will publish more useful information…

Friday, May 16, 2014

Something about developing.

As far as we have come, we may be ready to start developing. For now, we know how to use the camera, we also told something about darkrooms, and then a little about developing tanks. The next logical step is going to be doing the develop itself.

The process to develop a photosensitive material is the procedure, in which, we are going to bring the images that are stored in the film, and making it no longer sensitive to light. 

You may look on internet, and almost everyone is going to have it's own developing process, this is because we are free to experiment as much as it suits one. that is why I would like to explain what I think is the standard process. I also will highlight the steps that must be done, and explain why some are kind of optional.

  1. Presoak
  2. Develop*
  3. Stop Bath
  4. Wash
  5. Fix*
  6. Wash
  7. Hypo solution
  8. Final rinse*
  9. Coating
  10. Dry
The entries marked with the * means that they must be done. 

Presoak

This step is intended to be done with water. This is to clean the film from any dust particle, finger marks and humidifies it so the developer will not act suddenly. We need to agitate the tank, with water, at least for 30 sec.

Develop

The whole process is around it, and this is going to be the chemical in charge to bring the images stored in the film and become visible, but not just free from light sensitivity (if we take our film out of the tank it will be ruined as the light will still react with the emulsion). 

But when you go to the photo store, and you say to the store clerk: "Could you give me a developer?" he immediately will reply "Which one Mr./Mrs.?". So yes, there is going to be a developer from each major brand, and within the brand they may have several, and each one could be able to be mixed in different ways… what a haze!

A starting point, and one that I recommend most, is to search our film's user manual. This ones do not come with the film in the box, so google it! (the key words are the brand, the name of the film and fact sheet). But for now on I will explain about my own experience with the developers I know. As a big part of the whole, most developers are designed so they work perfect at temperatures between 20 to 24 º C (68 to 75.2 F). I most often try to use the developer as nearest to 20 ºC (68 F), in future references this is going to be the temperature.

Also very important to have at hand, is the developing chart for our film, this one most of the times comes with the original packaging.

Types of developers

Single use

There is a family of developers that will only work for once, and then we have to dispose them. The most popular of this kind of developers is Kodak's D-76. This developer is quite easy to mix, we only heat 3 liters (0.79 US gal) of  water until 52 ºC (125.6 F), pour the powder that comes in the packaging, once all mixed ad more water, 0.8 l (complete the US gallon). When the temperature goes down to room temp. ca. 20 ºC (68 F), we now have a developer in stock, meaning that is at its purest dilution. We are going to be able to mix it with water so we reduce its developing power for making more "softer" processes, in which we could bring more details, but at cost of our contrast.

In this type of developers we may see something like this on the developing chart 1+0, 1+1, 1+3. What do these mean? This is a sum, in which the first number is the quantity of developer we need plus the quantity of water we are going to use to dilute.

1+0 means that we are only use the chemical
1+1 means that we are going to use half developer, half water
1+3 means that we are going to use one part of developer and three of water

Are some developers like Agfa's Rodinal (I do not like it) that uses dilutions like 1+59, 1+60. But how do we know how much do we need. Well, in the bottom of the plastic tanks it says something like 135 x 1 = 300 cc, means that for one 135 film we need at least 300 cc (cubic centimeters) of developer, 100 ml (nearly 10.2 fl. oz.), so 300 is our goal, and we want to do a 1+3 dilution. The first step is to divide our goal by the sum of the 1+3, is 4, so 300 divided by 4, that equals 75. The next step is: we need one of developer plus 3 of water, 75 multiplied by 3 is 225, we take that and then ad the 75 of developer we needed an now we have our developer in 1+3. Single metal tanks need 250 ml (8.5 fl. oz.).

Once our developer is ready for the job, we pour it in the tank, put our clock in the time the chart indicated, at the right temperature, and we start the process. Regardless the type or the brand of developer one of the most recurrent habits is to agitate the tank, there is fact sheet recommendation, that tells us to agitate the tank 10 seconds each minute. You can agitate more often, just to blow up the grain, but you can not do it, this helps that the development process occurs as even as posible. As we cycle the particles inside, moving fresh chemical near the emulsion.

Just one the clocks hits zero, we toss it to the drainage. And be ready to pour the next chemical, but for now is time to explain about the other kind of developer.

Multiple use

It may seem a little bit logical, this developers are able to work even after certain number of uses, this developers are once prepared and there is nothing else to do. The most common developers are Kodak's HC-110 (dilution B, is for film) and T-Max, Ilford's ID-11 and Microphen. These four can only hold 10 processes, after the tenth the results are uneven.

The only problem with those is that with each use the developer looses it power, but it can be compensated with more time. For example with HC-110, we have used it like 6 times, for each use we add 10 seconds to the chart time, this means, if the chart says, the film develops with 5 min, we add sixty seconds to it, a whole minute, our develop time will become 6 min.

While with Ilford is a little bit different, in this case we have to ad percentages, for example it is going to be the 8th process, so I have to ad the 70% of the original time, in this case 8 min. the 70% of 8 is 5.6 min, so we have to sum it to the original time, 13.6 min is our developing time.

Just as a little note, ID-11 and Microphen can be diluted, if we do so, they will become single use developers.

When you become more familiar there exist other classifications to developers, multi-propuse, fine grain, being the most common. In this case I recommend giving each one a try to find the one that likes you most.

Stop Bath

This chemical is the easiest one to prepare and can be switched with vinegar. The job is going to do, is to stop the effects of the developer, so our developing time comes as closer as the chart says. It will only work for 30 seconds and we have to agitate all the time.

Wash

This little wash is to clean all the residues could be left during the developing and the stop bath, it is made with tap water, and it lasts 30 seconds with constant stir.

Fix

The second most important step during the process, this chemical will transform the silver halides to silver salts, that are no longer sensitive to light. So once the film is bathed with this, it will become light safe, you cant take it out and nothing will not happen. It will also give the longevity to your processed film, a well done fix will make your film endure at least 20-30 years.

The fixer I found most easy in Mexico City is the Rapid Fixer from Kodak, I do not know any other, so I am not able to tell you if is fast or no, but I can tell you that it is working properly or not. The time I recommend for the fixing process is to let it be in the tank for at least 10 minutes, with the same agitation scheme as with the developer. You can take out the film and if it is still purplish it still needs fixer, if more than 20 min with this, that means you need to change your fixing solution with new.

Rapid fixer for film is easily prepared, it comes in two bottles, the fixer and a hardener, use 1.9 liters (0.5 US gal.), pour the fixer bottle, mix it well, pour the hardener bottle, mix well and ad enough water to fill 3.8 liters (1 US gal.). This will endure as long as six months in a well closed bottle.

Hypo solution

The fixer tend to left undesired residues on the film, that will cause stains in the emulsion, so this Hypo solution will help to wash it quickly. Before pouring the Hypo, do a wash, just like the one before the fix process. 

This Hypo, here, it is sold in small bags, to prepare just one liter (33.8 US fl. oz.), just heat water, pour the powder, mix it, and presto, you have Hypo solution.

During the process it just needs two minutes with the same agitation scheme as the developer.

Final rinse

This is done with tap water and the time will depend on the usage of Hypo solution, if it was used you have to add water for five minutes, changing the water each minute. With the same scheme of agitation as the developer.

If you have not used Hypo solution, be prepared to left the film almost a day in water, and keep changing the water at least one hour, agitation… try to do it from time to time. This step must be done to wash the film from any residue from the steps before.

Coating

With time, Kodak, created a chemical called Photo-Flo, that is aimed to protect from small scratches and make the emulsion static free, so dust will not stick to it. Also gives the film a shiny finish to it. In this case left it one minute and any agitation, this chemical is soapy, so it will form foam if stirred, so avoid it.

Dry

The last part of the whole process, find a place to hang the film, cloth clippers are good for this, and do not forget to use a counter weight to keep the film stretched and avoid the natural curvature. The drying time will depend on where do you leave it, but for most of times it will take 30 min to one hour.

This has been the steps I usually do to develop a film, as said before there are some steps that are not essential, but aid in making the process cleaner and leaving better results. The next question is how to keep you film, in the US is a brand called Print File, they manufacture special sheets with sleeves to preserve the strips. I think they are the most easy to find and economic too. Just do not forget to find a dry cool place at your house to preserve your films, as humidity will damage them.

Wednesday, May 7, 2014

More about darkrooms!

In the last entry I told you that I will not be leaving a lot of time before I post something new, well in this video I show some of the other things you must consider to get for starting a darkroom. I hope you enjoy it!


Tuesday, May 6, 2014

How to start a Darkroom

For now on, the core of the posts are going to be oriented on things that really more into Darkroom things, and with time I will start to teach some photo technics.

But first things first, what is a Darkroom? Do I need one? The first answer may seem obvious, but it has to requiere certain elements. While on the second tough, it will depend highly on if you want to just develop film and scan it, or if you want to do the whole process, make prints.

In the first option, there is no need to have a room solely to photography, or adapted to it. You will be able to do fine with a film changing bag. This bags are sold, or can be DIY.


As a disclaimer, I have never used one, but the concept its easy. As you can see on the image above, the bag has a zipper and a pair of sleeves (may not seem quite sleeves, but they are) with gloves at the end. This bags were made to manipulate film or plates, so you will be able to transfer it to the developing tank, they are also great for landscape pinhole photographers, as they try to change their stuff light safe. So how you use them, well you just open the zipper and put the film (still with its can or wrapped within its paper, in case of a 120, or the plate holder), the tank to develop (with all the parts, as mention on the video in the last entry), a pair of scissors (if a 135). When all that stuff is inside the bag, close the zipper and then via the sleeves, you insert your hands. And start manipulating the film and the tanks, until the film is safe inside the tank, so in that moment you can take that out and start processing your film.

The other way involves to adapt an existing room in your house, but not any room, it has to meet at least two things. That it can become dark at will, meaning that any light can enter into the room, second and also very important, access to tap water. While with the changing bag you do not need to darken any room in your house, you are able to work in the kitchen or in the bathroom. With that in mind the place you are going to be able to adapt narrows your choose. It will lead you to use a bathroom, a kitchen or in special situations, the laundry room. Before taking any step further be sure that you have the permission of your family members, specially if you still live with your parents.

Undoubtedly, the best option is to use a room that is in the basement, these rooms, most of the times have small windows or any. But if you do not have a basement with a laundry room or bathroom (I heavily think any would have a kitchen in the basement) you will have to be able to tape black paper in the windows, this material is not expensive as it can be found where arts or office materials are supplied, and the best material to paste it is duct tape, you know that black one that is not very sticky, and do not left many marks.

Black paper
You have to measure your windows, so you buy the right amount of paper. The first time when you are assembling the papers, try to do it when the most intense light is going to be entering to that room, so you can easy find any light that could slip in, and find that little hole and block it with the duct tape. If you are only able to work at night, it is more easy to achieve total darkness inside.

As far as we have gone, this is to set up the space just to manipulate film, and start a developing process. This time I will not take too much time to write about developing chemicals. If you intend to build the whole darkroom, it is because you are also wanting to do some enlargements. In that case you will have to considerate space to accommodate an enlarger and at least five photographic trays. The size of the enlarger will depend on what you find, there are different type and sizes of enlargers, and the size of the trays can be determined by the size of the enlarger, bigger machines are able to project bigger images, or the space you still have. The most common household printing size is 8x10 inches, so you can go a photographic supply store and ask if they still sell trays, in that case they will ask you the bigger size photo you intend to enlarge. Most common tray sizes are for 5x7, 8x10, 11x16 and 12x18 in. Bigger sizes are hard to achieve in house darkrooms, the solution for bigger enlargements is to use a print developing tank, hard to find nowadays. So for this time see you soon!

I leave you with a photo when I started my own Darkroom, it was and unused bathroom in the basement of my house. (The extra lighting was just for the photo)


Tuesday, April 29, 2014

This is just a mid-point

Stem readers, I would like to hear about your opinions. I have been writing for a while now. Just to remember you, I wanted to start by explaining the basic concepts of photography, as what does ISO, shutter speed and aperture means.

I believe there are tons of explanations on how to use a camera, most notable, due to fact that digital cameras are used in the same manner. But for now I wish to know something about you. From now on I will start to explain more darkroom oriented topics. And I am asking you:
  • What do you expect?
  • What would you like to learn?
  • Do you have any idea in mind?
After this I will give you a little resume of what topics I am going to be explaining the next weeks:
  • How to make a darkroom.
  • Types of chemicals for developing, developer, stop bath, fixer, hypo solution, photo-flo.
  • How to choose an enlarger. Enlarger accessories.
With time, I hope to have enough money to buy color chemicals and explain them. (Except E-6 process, I will explain why).

(Sorry if this post does not contain explanations, or something like that…)


Saturday, April 26, 2014

About the film picker and developing tanks

This is the last video I have posted on Youtube, I explain a bit of the film picker and developing tanks.


Wednesday, April 23, 2014

Equivalent lectures

I hope, my stem readers, that you have practiced how to read the expose meters on your cameras. If you still have some doubts, please be confident enough to send me a comment.

When you master how to read the values, now you are prepared to make equivalent lectures. This means, that you are able to change shutter speed or ƒ numbers to accommodate your needs or the end result you wish, without changing the quantity of light that is going to get into the film. Maybe by now, you are going to be able to have an idea if you know what each light step means.

This is going to be a little bit more practical than before. First of all, lets imagine that a friend of us has a hand expose meter, and he (or she) measures the light on his face, and the displays says: s 1/250 @ ƒ 4.0. In this case we want to blow away the background, in other words, make it unfocused. How do we do that? Easy one! We just open the lens aperture, in this case we are going all the way to ƒ 2.0. If we write an scale:

ƒ numbers   1.4   2.0   2.8   4.0   5.6   8.0   11   16   22

Speed   15   30   60   125   250   500   1000   2000

Note: I did not write the 1/ of the speed

Each number is a step, in which I am going to let pass the double or the half of light, so if we are in ƒ 4.0 and we want to go to ƒ 2.0, how many steps are we moving? Just two steps, but in this moment we let enter four times the amount of light to make a perfect exposure, so what do we do now? We have speed in the other hand and as we are not worried about its effect, we are going to move it the same number of steps until it compensates the light we let pass with the aperture, this means we are going to move the speed to 1/1000, as it let passes four times less light than before, and so our new lecture is going to be 1/1000 @ ƒ 2.0 and we assure a shallow depth of field as we wanted to do the portrait of our friend.

This also applies to the case in which you are more concerned about the speed, for example not letting it go below 1/30. For example, we are in a place where the Sun is about to set, the shadows are very long and dark, but we found that some places where the lights still passes trough is interesting, we make a lecture with our camera, and it says: 1/8 @ ƒ 8.0, and also we do not bring any tripod, and there is not a table at sight. 

ƒ numbers   1.4   2.0   2.8   4.0   5.6   8.0   11   16   22

Speed   8  15   30   60   125   250   500   1000   2000

Note: I did not write the 1/ of the speed

We want to be safe about shutter speed, so we want to shot at 1/60, so from 1/8 to 1/60 are three steps, in which we will not let pass much light at all, like about 8 times, so what do we do next, is compensate with the ƒ number, the same number of steps, so we let pass more light to it, from ƒ 8.0 we head to ƒ 2.8, and this way we end letting pass the same amount of light as the original reading.

The next pair of images exemplifies the Equivalent lectures.

1" @ ƒ 8.0

1/15 @ ƒ 2.0
Contrast seems a little bit different on each… but as you can observe, both have similar amounts of light on them, the only difference is how I wanted to move DoF, so only the little turtle was in focus. As you can notice both values moved five steps, if I just moved one without compensating the speed that would be blank image.

Wednesday, April 16, 2014

And now… what?

We have discussed about film sensibility, shutter speed and aperture, all of which will have a different effect on how our image will be. But now, if we are using light and we are using all those parameters, for whichever reason, how do we know how many light is the right amount. Well, said in greater words, ISO is going to be the one who decides, but photographers will not talk about lumens or luxes (units for measuring light) but instead of that, they will explain everything with shutter speeds and aperture values. If you are a digital photographer in the making, do not use ISO Auto, as this will not let you advance. Film photographers, well, ISO can not be changed in the whole thing, so do not worry about that.

But before we continue on, we need to know how we measure our source material, light. So there are essentially two ways for doing so. Incident or reflected, one is more accurate than the other, but in the other hand the other is more practical. Lets go in parts.

Incident light

As far as mankind knows, light travels trough space but it tends to dissipate, and we can see this phenomena in just any lamp, as we put it higher it will draw a bigger circle but its "power" to illuminate will diminish, this happens because light travels in any directions, and sum to that the fact that there is also air, that has particles floating in it. Where are we going with this, that depending on how far the light source is, the intensity of it will be different. In the case of natural light, the Sun, it is a little bit irrelevant, but with artificial sources this is the most important consideration. 

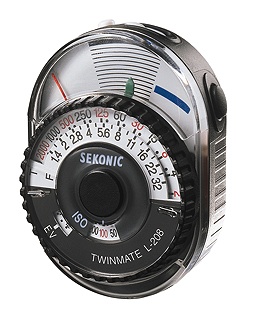
In this case of light metering, what you are going to buy is a hand expose meter, the most basic of this devices will have a light sensitive zone. Older models, had the look of an old voltmeter, as they used selenium, an compound that exposed to light will generate a voltage, so depending on the quantity of light the voltage will vary.
Many of this expose meters, you just set the dial in which the green and the red lines were one over the other, and then read the combination below. As you can see, it has a speed and an aperture scales, so when you made both were aligned, you were able to choose, ƒ 8 @ 1/60 (using the image as reference) but you also get something called, equivalent measures, we will discuss that later.

Most modern light meters are digital now, and most of them have at least three basic functions, ambient light, flash and flash with cord. The ambient light, well, may seem obvious but is when we are going to meter, continuous sources of light, like the sun or light bulbs. The other two functions will depend, in one, the device, will be waiting for the flash to fire and then measure, and the one with the cord, the apparatus is connected directly to the flashes and send the signal so it fires them.


In both, analogue or digital, we need to face the light sensitive part to the light source. As we are using a device solely to meter, this is why is the most accurate way of getting the exposure value, aperture and speed, on one ISO sensibility.

The downside of all of this, is that you have to buy an extra, that the cheapest are between $150-$200 USD, new, as always you can go to flea markets, swap meets, and so and maybe have luck and find one in great conditions. But do not fear my fellow readers, since a long time camera manufactures had come with a nice solution.

Reflective light

Last method worked by recieving light directly from the source, this one will work differently, and works just like our eyes do. We see because light is reflected from the objects, white light contains all the colors within it, we see the colors of things because they absorb the other colors and reflects the color they are. Inspired on this way of metering light, cameras from the 70's and on, were manufactured with an expose meter integrated with them. Some were like a crystal thing with bubbles attached to the camera, but other were more advance and the term TTL became famous, this means Trough The Lens, this meant that the light that passed trough the lens made the measure. This kind of metering was so accepted, because the expose meter was showed in the viewfinder, mostly in SLR's, so the photographer has a fast glimpse if it need more or less light for his/her shot.

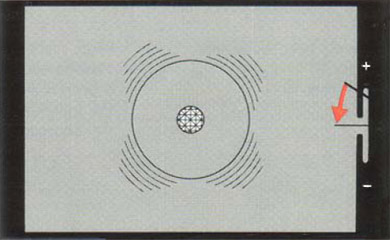
Depending on how old and brand the camera is, the expose meter is displayed in different ways, some are very simple while others are quite trouble some. The most commons are like this:


In this case of expose meters, there is a needle, a plus a minus sign, and the middle mark, if the moving needle is charge to the minus, it means that your original settings are not letting enough light to pass, just compensate with speed or aperture letting more light pass (just move one, do not move the two freely), do this until, the needle stays very close the the middle mark. Doing so, we are going to have a well exposed photo, if the needle is in the less zone this means that our photograph is going to be underexposed, meaning that we let pass less amount of light that the one needed. This will lead to dark pictures with textureless darks and grey whites. In the other hand, leant to the plus side, we will end with an overexposed image, this will make that our blacks will not be blacks and our whites will not have textures. But as a safety for each photo it is better to be slightly overexpose, doing so we are going to force to the negative to receive information, that latter will be visible in the print.

There are other kinds of displays, there is one just with the plus, the minus and a dot. In this case each sing will shine, and when the dot shines the exposure is right. But there are some that are not as easy to get, there are some without lesses and pluses, some Minoltas used to have some like this:


In this case of exposure meters the needle in function of the aperture selected will move to the most suitable speed, at the beginning is a little bit confusing, but it all depends when both, speed meets the aperture, in this kind of expose meters, at the start, is hard to tell when is over or under exposed.

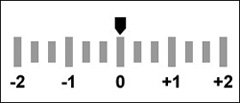
Newer expose meters are more like a ruler, with a mid-point, less or plus, but showed in steps, and some in half or thirds of a step. Canon and Nikon have something like this:


But this way of metering is not fool proof, it will depend highly on the lens mounted, how big is the metering zone inside the camera, or in modern cameras, how many metering dots has and the most important of all, it uses reflected light and not everything reflects the same amount of light, a white cup compared to a black one, the light one reflects more light than the darker one, and so we could end with a failed metering. In the next to images this is going to be demonstrated.
When you meter over something bright, like the white cup, the camera thinks is overexposed, and tells you that you need less light, resulting in an underexposed image, also se how white became gray.

When you meter over something dark, the camera thinks the image is underexposed, and tells you to let more light to pass, this will result on an overexposed image, see how whites start to lose details, and also textures.

But do not fear, there are ways to achieve the right measure, and is not with any fancy stuff, is even a little bit old in fact. All the cameras' expose meters are calibrated to something called Grey at 16% or medium gray. So if the camera is expecting to see this gray, why not to use something that has this reflectance, here is when the Grey Card comes to hand, this cards can be found in any photographic supply store, it is also wide used in digital photography (not precisely to measure but for Withe Balance). They come as just a cardboard card with a gray side or be more sophisticated like a cube, that also has white, black and shiny things, more oriented to digital photography.

This image was metered using a grey card, see how balanced are the whites compared to the blacks, and compared to the last to images, is the one where Beatles could be read clearly, but without losing textures.

The grey card was just showed, and compare it with the previous image, in which we do not need to show it to have a nice photograph.

To use the Grey Card we only need to put it in front of the lens, parallel to the lens front face and adjust speed or aperture so the meter is in the center, well expose, zone. Then we proceed to take the card of the sight of the lens and proceed to take the photograph. If we do not have a grey card at hand, our body has a part that reflects almost the same amount of light than a grey card, and is the palm of our hand, so we could put our hand in front of the lens, adjust the exposure so the meter stays in the zero zone, take the hand out of the zone and take our pic.

Friday, April 11, 2014

The last part of the exposure triangle: ƒ numbers.

Last week’s post was all about shutter speeds, and if we remember what was all about, it explained how shutter speed affects how moving objects may or not may be seen, stilled or blurry. 

This post is going to be the finale of the triangle exposure, next week I am going to be explaining how to mesure light, so we will be able to know how much light our photograph is going to need.

Before shutter speeds existed, the ƒ numbers were already invented. The photograph camera as an imitation of the human eye, and the knowledge about stenopeic (from greek, stretch opening). But the human eye has something called iris, which, controls the pass through light just by altering the area of light that is passing through, but the eye is capable of maintaining most of the things focused thanks to the ability of having a focal length, while in the stenopeic camera, the little opening is the focal length itself. So adding arrangements of crystals, we are forcing the camera to be able to work almost like the human eye. Also cameras were able to have more sophisticated crystal arrangements, and with it different focal lengths without the need to change the size of the camera. And with it, the lenses gained the ability to have and iris, but in photography are more often called diaphragm or ƒ numbers.

The ƒ numbers are defined by the area formed by the iris, this means the area of light that is going to pass trough and so, also the go by double the area or the half of area, but defining this is not like the ones in time or ISO values. The ƒ number is defined as:

ƒ = √(2n)0≤n<∞

Square root of two power of n, in which, n  is equal and greater than cero and less than infinity.

So in this case n is the number that is going to go in increments of 1, starting from zero. Doing this so, is going to give us approximate numbers to the ƒ numbers. The most common are:

ƒ 1.4
ƒ 2.0
ƒ 2.8
ƒ 4.0
ƒ 5.6
ƒ 8.0
ƒ 11
ƒ 16
ƒ 22
ƒ 32
ƒ 64
ƒ 90.5
ƒ 128

From top to below the quantity of light that is passing trough is the half, so ƒ 1.4 lets pass more light than ƒ 2.0. And just like the last article mentions it, they had become with half steps or third steps. Like ƒ 1.8 is half step of ƒ 1.4 and ƒ 2.0.


The second most important of ƒ numbers is the Depth of Field (DoF)


Just like the shutter speed, the ƒ number will modify the end result of a photograph, but in this case the difference is about the sharpness of what the lens is going to see. And that is called the depth of field. The DoF, to abbreviate, is the distance in front of the lens that is going to be sharp, this distance will be around the the focused object, this will apply in front and behind it.

This happens because wider openings will let pass "irregular" light, that is going to make that light coming from places outer the DoF, be projected in the film as blurry or diffused, as we go closing the opening, this will force light to pass more concentrated trough the lens, something like a stenopeic camera, and increases de DoF, making most of things defined.

This diagram shows how the DoF go in front and behind the focused subject.
The next images are going to illustrate how DoF changes, depending on how wide or closed the diaphragm is.


ƒ 1.8

ƒ 2.8

ƒ 4.0

ƒ 5.6

ƒ 8.0

ƒ 11

ƒ 16


As you can appreciate, as the aperture goes smaller the quantity of sharp objects increase, at ƒ 1.8 only the elephant is focused, but everything behind and in front of it is "unfocused", above ƒ 11 the Crystal Frog and the Golden Cat became sharp enough, but if you put attention to the background, the line behind is kind of blurry, maybe the next aperture value will define it.

In more serious photos, controlling the DoF will force the viewer to concentrate in only one thing, as you can see in the first images, even if the Golden Cat shines in the background, your attention concentrates on the Elephant, so mastering this technique for portraits is quite a rule, so your subject will be over all the things.

In the other hand if we try to do a landscape or we want to see the most details on everything we are going to focus on smaller apertures, preferable above ƒ 5.6, as in the example, almost all the toys are seen clearly.

There are other ways to have shallow DoF, but that depends highly in the focal length, and will be discussed on other entry.

Thursday, April 3, 2014

The second part of the Triangle Exposure

Last entry was focused on ISO, what it meant and what considerations you should take. This time, I am going to explain about Shutter Speeds or in other words how much time we will expose the film.

In the history of photography Shutter Speed became after the aperture, but I think is easier to understand. Before standardized shutter speeds,  the photographer just put off a lens cap and wait a little time to just cover it again, something that today stenopeic photographers still do. As manufacturing technics advanced, and different ISO sensibilities became much wider, different shutter speeds appeared. Like many concepts in photography, shutter speed was determined by dobles and halfs. So if we take for instance, one thousand of a second the starting point, the double of light we need is: (1/1000)/2 (one thousand of a second divided by two) will equals 1/500. And so on.


1/1000
1/500
1/250
1/125

As long for this seems very straight forward, due the fact that 125/2 will equals 62.5, makes very specific to do mechanisms, they went to the easiest nearest value 1/60.
If you make the division:
1/62.5 = 0.016
1/60 = 0.01666667
so, its the same…

1/60
1/30
1/15
1/8
1/4
1/2
1"

Most old cameras will have a dial with this values, but those, will be without the "1/" and only show the denominator of the division, so you will see 1000, 250, 30, etc.  In later models, the ones with digital displays, will have medium values, for example: one between 1/60 and 1/30, 1/45. These are called half stops, and digital cameras will have thirds of a stop. Also this electronic cameras will have longer times programed, from 1 second (1") all the way to 30". Some old cameras will have different colored numbers. The most commons are:
  • 60 Synchronization speed
  • 30 or under, shutter speeds too low that are not recommended to shot the camera unless you use a tripod or other stable elements (like a table).
  • In some cases only 1 comes in a different color, representing is 1 second
Most SLR, because not all (like the Canon T50) will have a B on the dial. This B means Bulb, this mode or selectable speed is a speed chosen by the photographer, more like the old days, and is used for longer exposures, longer that the slowest time that the camera let. The shutter will be open as long as the shutter button is pressed. But as mentioned with speeds slower than 30, you are going to need extra help, from a tripod, or something else that could keep the camera fixed. In the case of the B, is also recommended the use of a shutter release cord. Older cameras will have more standardized accessories, while electronic ones, in most of the cases, will only accept first party cords. The cord will have a block system, in which there is no need to be continuously pressing the shutter, just to remember when to release it.

As for some mechanical cameras, and all semi-automatic, you could choose freely the speed. In old cameras, some lenses had an A, mostly in green, in the aperture selection ring, and in the electronic cameras, there is a mode called Tv (Canon and Minolta) or just S in Nikon. So by now you are not going to worry about selecting the right aperture value. The next week topic.

There are two major effects created by the shutter speed, blur or still.

Blur

It is said, and it is true, that the whole Universe is in motion, but depending on which point of view we have chosen, things may be moving or may be still. Most of the times people think photography is just a moment captured, although, a photo is able to record the succession of moments in just one shot, it can illustrate trajectories.  This effect is going to give a sense of motion, and it is not very hard to achieve.

The only consideration we have to think about is the velocity of the object we try to photograph. For example: we see a juggler and he is doing some fancy stuff with his toys, we could try to have a sharp still image of his face but not of his toys. In this case his toys are moving way more faster than the juggler, he is standing still and just his hands are moving. The slowest speed in which I am able to shot without a tripod, is 1/30. So if he is standing still, and just moving his hands, the end result may be of some blur on his hands and his toys, while his face may seem still. If I would go with slower speeds, if I had the tripod, I could be in risk of making everything blurry, even the juggler. 

But in shiny conditions, if you are able to do it with sunlight, very long exposures will tend to "erase" the blur, as the original object you tried to blur is no longer in front of the camera, and the objects behind it will start to show in the image. The only sure blur that will last long enough, are when at night, you do it with objects that emit light, like cars or county fair rides, they last because the background is dark, and it takes more time to be exposed.

Still

For many years of advertisements, the still has been the selling point for cameras, even nowadays, in which there are cell phones with very sensitive sensors… Just as in school, the opposite of blur is the still, in which everything that may be in motion will appear frozen in time, that magic moment in which many sport photographers rely on.

Remembering the Juggler and his toys, in this case we want to have everything still, so we are going to go the opposite way in the shutter speed scale, as his toys may be moving in quite a fashionable way, we will try to set it to 1/250, the blink of the shutter may be fast enough to just see the toys just that 0.004 of a second, not letting expose the trajectory.

The next two images are little examples of a blur and a still, it was made with a digital camera, just for didactic proposes.
This image was shot 1/45, you can clearly see how pages overlap above them.

This one was shot with 1/125, maybe it does not see very obvious, but all the pages look like if the were still.
I leave you with the video tutorial in which I show you how shutter speed is controlled by the camera, and how to select it on a semi-automatic camera.


Wednesday, April 2, 2014

Some examples of different ISO sensibilities

Last time I just explained different ISO sensibilities but I did not give some examples to exemplify what I wrote.

All of the next examples are 8x10 enlargements I made.


This one was shot with Ilford HP5 at 400 ISO, as you can appreciate grain is not so visible, but not invisible. It can handle good detail.


This film was Ilford Delta 400, shot at 400 ISO. Compared with the HP5 grain is smaller and holds better details. This film can emulate the feeling of a 100 ISO film.


This last image was shot with Delta 3200, at 3200, at first glance grain is visible, but as was developed with Ilford Micrphen, grain does not explode, and gives a nice texture to the image, even a warm one. But some details become diffuse 

Sorry if I did not published a 100 ISO photograph, I was not able to find one. 

Wednesday, March 26, 2014

How to expose

For many this is going to be the core of all the course, because the Exposition is something that has not changed in the digital realm. As for me the concept that I like most is the Triangle of Exposure.

It is like the Combustion Triangle, in which there are three concepts that will support the main idea. I have acknowledge of other concepts like the one with the tap and the bucket, if you want that I explain it leave a comment. To start with, the three concepts that put together the Triangle are:
  • Film sensibility (ISO/ASA/DIN)
  • Shutter Speed
  • Lens aperture
Each one has its distinctive features, effects and priorities, which all will depend on how you would like that your photography is going to be.

I am going to discuss it in the order I have listed them. Essentially because in the film we are restrained to have ONE and only ONE film sensibility, there are some considerations if we intend to do forced or counter-forced expositions, and even in those cases, we have to shot the entire roll in one sensibility, not as in digital, in which we can change at will the sensibility to adjust to our needs in each shot.

This is one of the reasons I like more film photography, you have to choose what film to use, and you are restrained to make each one count as the good, even if you do not enlarge it.

Film sensibility

At the very beginning of photography this was not a very used term, this was photographers were able to use safelight to develop and only existed plates, so to develop them they used trays. They made the shot, with some known time and aperture, and then during the developing process they could see how the image appear and stop the process when they tough it has reached the best image. But as photography was becoming more mainstream, due to cinema and companies like Kodak, research and new technology changed the films sensibility to light and with it, the need to name that sensibility.

In the United States the American Standards Agency (ASA, now is it called ANSI), had the most influence in the Americas and Japan about how to call the film speed, while in Europe was Deutsches Institut für Normung (DIN) the one responsible for such labor. It is something like International System of Measurements and Imperial System, both told the same thing but with different scales, each institution made their own experiments on how to determine film speed. As time advance to a much more standardized World, International Organization for Standardization (ISO) was born, this Organization decided to use the two systems, so when one buys a film in the box comes as ISO 400/27º. I, as a Mexican, live under the ASA concepts then adopted by ISO. But both scales are direct one with another, interchangeable without any mathematical operation or so, not as 1 ft moreless equals 0.30 m. Most common values are:

ASA        DIN
50        18
100       21
200       24
400       27
800       30
1600     33
3200    36

As you can see ASA scale work with doubles and halfs, 100 being the double of 50, and 1600 being the half of 3600. In the other hand DIN goes in sums of three between each other, as 18 plus 3 gives 21 for the next film sensibility, but as long as now I have not explained what this numbers represent. 

So now going on, the smaller the number the lesser the sensibility is going to be, this means it is going to need a lot of light to be well exposed, and as the number goes higher the sensibility grows with it, meaning you will not need many light to have a good exposure. And the relationship each one with the another is going to be the doble or the half. Ej. lets took ISO 100/21º, if we go to 50/18º this will tell that we are going to need the double of light to have a good exposure, compared to 100/21º, and viceversa with 200/24º, it is going to need the half of light needed for 100/21º to get the same exposure. But the next question is going to be, Why to have different film speeds? If we are able to shot almost in any condition with 800/30º, for example.

Well there are some cons and pros, depending on which film speed we are intending to use. Film speed is also related to the size of the silver halides the emulsion contains, as smaller the number is, the salts are going to be smaller, which is going to be handy if we want to have the most definition of the image we intend to capture, very useful in landscape, product or studio and maybe portraits. But with the cost of needing a lot of light to achieve a good exposure, so in the cases of landscape tripod is going to be mandatory, in the studio, well we are going to be controlling light via lamps, flashes and using an exposure meter, and in portraits, well as we are going to see later,  wide open lens apertures; we also gain better contrast* with lower ISO values. That is why the largest photos ever are made with low ISO values, as it grants the best definition. But in special cases as sport photography, scientific, and places in which light is not the best of all or we need to achieve the photo we want, the cost is a little loss of sharpness and contrast, as higher ISO values have bigger silver halide grains. 

A way to classify higher or lower ISO's is the next: take for instance 100/21º as the mid-point, below that value, even as low as 6/9º they are called slow emulsions or films, as explained earlier, a lot of light is needed. Then, from 100/21º to 400/27º are the mid-term speed films, more likely as the standard, as you have a balance between outdoors and indoors using artificial light (as lamps or flashes), and medium sized grains. Higher than 400/27º are called quick films, as low light is needed to expose.

The last technologies applied to Black and White photography were made by Kodak and Ilford, as they in the late 80's and 90's developed their T-Max and Delta series. They found a way to give the grains certain shape, Kodak saw T's and Ilford saw ∆'s (capital letter delta), which made possible to arrange them better, and with that more sensibility with smaller grains. Both films are marketed as Pro films. As I know Kodak sells T-Max 100/21º, 400/27º and 3200/36ª (really 800/30º, but can easily pushed to 3200/36º), and the best results are given if you develop with T-Max developer (very self-explanatory) and in the other hand Ilford's are 100/21º, 400/27º (can be used as 200/24º to 3200/36º) and 3600/36º (really being 1000/31º, but can be pushed to 12500/42º), the best results with this films are obtained using at least ID-11 developer, but are better using Mircophen.

So before hitting the street with you camera, and if it isn't loaded, stop and think to which situations are you going to be facing, because that is going to be the best parameter to select a film. If you are going to be out in a sunny day, without any trouble you can use ISO 100/21º, but if you are going to be in a familiar reunion inside a house better choose 400/27º, or any sports event better go higher, even if it is sunny.


*Contrast, for me, is like how intense are the whites and the blacks. For example: in high contrast you will only see whites and blacks but not so many grays, in low contrast you will not see white or black just a big range of grays. Depending on what are you going to achieve at the start it is better to look for a medium contrast, the one that is going to have white, black and the variety of grays.

Wednesday, March 19, 2014

Detail in some Cameras and Bulk Film

The passion of taking photographs has not being limited to just some professionals, but ironically, the best materials are branded as Pro. But what Pro stands for, well at least in photography, or what have I understand, is referred as the knowledge on how to use the camera, and profit at its best the film, during the shooting, the developing and printing of the image.

Most Pro cameras have extended functions, that may not be used by the amateur, even pro, photographers. In the other hand, film marketed as Pro will have a much wider ability to be used, as pro films will have a much smaller grain, compared to the same speed ratio, and a much higher latitude. Latitude means that a film can hold other ISO (ASA/DIN) than the one is marketed as. For example, Ilford Delta 400 film can be exposed as an 200 ISO or as an 3600 ISO, and whatever is in between. So as for film, the extra money gives extra abilities that used properly will be able to make you get better results.

The video of this week will be focused on my cameras, and how to use bulk film.

For the next video in the series, I show how to fill 35 mm magazines with the bulk film loader. For this instance, these are the things you are going to be needing:


  • Bulk loader
  • Bulk film
  • Scissors
  • Tape
  • Empty magazines with at least a finger wide film out or refillable magazines and some useless film
  • Dark Room* or light probe bag
Bulk film may be kind of expensive at the start, but as you go shooting, it is cheaper than buying new film in small packages. A bulk film will produce 19 to 20 rolls, that will cost the half than buying those same 19 or 20 rolls, also you have the freedom to choose how many exposures each load have. This is useful if you like to think each shot and you take some time to finish it, also gives you the easiness of have one themed rolls, so printing may become more easy, as most exposures have little change in lighting settings.


Friday, March 14, 2014

About cameras and film formats

Well as I said before, I will not go into the realm of brands, instead of that, I would prefer to talk about kinds of cameras, by the format they can hold. You will find more precise information through books or the Internet itself. This entry is more focused on what are you going to need after to develop and print your negatives.

Since the start of photography inventors and engineers developed quite a variety of film, in size and form. Today we still have three major flavors of film, and so three kinds of cameras:


  • 135 film: The most used film, even before used by photography (its first primary use was to do cinema), from hi-tech SLR to just plastic point-&shot and even disposable cameras. One of the most recognizable format. 
    • The pros are:
      • Easy to handle, it is self contained inside a canister, last generation cameras (even point-&shot) were able to determine the film speed, thanks to DX codes.
      • Easy to find, as the most famous member of the film family it is still available in convenience stores, super markets and photographic materials supply.
      • Wide variety of cameras, in the second hand market, flea markets and forgotten attics, you have a great chance of finding a usable cameras.
      • Most amateur photo stuff was designed for this format.
      • Any enlarger will be prepared to let you print images.
    • The cons are:
      • It is the smallest of film sizes found near, it captures great detail, but you are not going to be able to print enlargements bigger than 60" (in.) (It is not so con but is the classic one!).
      • Without the correct tools, like a film picker, you are going to end breaking a lot of canisters, which can make you spend a little bit more of money. If you wish to save some pennies, it is worthwhile to search for bulk film, is a package that contains 100 ft. (30,5 m) of film, without the canisters. I will discuss about bulk film latter.
  • 120 film (or 6x6): This is a bigger film, it was the first to be commercialized by Kodak to easy to use market, it is older than 135. It is the favorite flavor of pro photographers, the cameras are not that big, but thanks to the size of the film you are going to get a lot of details, this was also the favorite size of NASA, most space photographs were made with Hasselblads.
    • The pros are:
      • Great detail, capable of doing much bigger enlargements.
      • Some cameras were able to have 6x6 or 6x4 or 6x4,5, so the photographer was not constrained to just one aspect ratio.
      • Most cameras have the ability to change were the film is loaded, so the photographer was able to change from B&W to color to slide, without the need to finish the film.
    • The cons are:
      • More oriented to pro markets, so cameras are quite expensive, even used ones, do not forget accessories.
      • Due to the fact the film is bigger, you may need to have an enlarger capable of hold the format, it is also recomendable to have an 80 mm lens for the enlarger.
      • If not very used to it, you are able to spoil the film, because the film is just winded in a spool and covered by a special paper.
      • Only 12 photographs by package.
  • Plates: The oldest brother from the family, it has evolved through the years but preserves the aura. The favorite of studio photographers, as the cameras are big, bigger than your head, and maybe your chest, you are attached to its stand, hopefully with little wheels so it can move a bit. 
    • The pros are:
      • Best quality, most plates nowadays are about 6x4 in. (10x15 cm), if you shot slides the colors are the most amazing than any Photoshoped photograph and if compared to a digital realm, a photograph from a plate would be the equivalent of using an 80 megapixel camera.
      • No need to do enlargements, photographs can be positive by contact printing.
      • Most cameras have a tilting and shifting lens, capable of modify the focus plane and/or the fugue of lines, making them really vertical.
    • The cons are:
      • Plates can not be developed in small tanks, can be done in trays, but with any kind of light, or can be processed in bigger tanks, oriented to printing processes.
      • Cameras are so big, is very difficult to go around with them, is like going out with a mini fridge.
      • Also you need to carry out a case for holding plates, as the holder can only have one at a time, later iterations from Kodak were able to hold two plates, one against the other.
This has been quite a fair amount of information. In my case, I use 135 film, mainly because my first camera is that format, then the older cameras from my house are also that format (just some point-&-shots). When I am able to buy a medium format (120) camera, I will inter to that realm, hope so soon. But in both cases, in the developing process are the same actions, the only considering point is about developing tanks. If you get a plastic developing tank, like the ones from Kaiser, the spirals can be size changed, so they can handle 135, 126 (a dead format) and 120, just be sure is the taller tank, the one that can handle two 135 at a time. If you are more likely to have metal spirals, you need to have the tank and the spiral for each format, in the case of the 120 tanks you can develop two 135 at the same time.

As mentioned with the plates, only if you have the tank for print processing the procedure is not that easy, as developing must be done with trays and there is not any safelight to use with. I recommend to start with 135 or 120, so they are the most easy to use formats.

Thursday, March 13, 2014

Part of the presentation

If you were wandering how I look like. Stop thinking of it. Here I am on Youtube. With time videos will get more interesting.


Welcome!

This is my first incursion on teaching old-school Darkroom photography in the Internet. Yes as I have mentioned it! Darkroom photography.

For me, at least, learning and trying to dominate film photography has been one of the best things that happened in my life. I have heard a lot of crossed reactions, from older photographers that got tired of darkroom chores, to guys that still love it, to young people that gets, as myself, marveled of how physical and chemical processes generate images.  I love so much film photography, that it could be a great loss if we do not keep it alive.

As about what I am going to use, through the blog and video tutorials, is what I have bought by the years, since I started to learn. I will try to keep it to the most economic as possible. I admit it, there are a lot of photographic stuff that is not even near to the meaning of cheap, but with some creativity, we can find some alternatives. About which camera is best… well, I will not touch that topic, it is like entering to religious stuff, like Apple vs. PC vs. Open Source (by the way I use Canon). The only brands that I will be telling you more about, are going to be related to photographic suppliers or film and paper brands.

At last but not least, I have been photographing, not professionally, by 3 years right now, lately I have also given lessons to newbies, from how to grab the camera to how to print a photo. Also, I have become the owner of my own Darkroom, so wait and maybe you are going to see that is not that hard to become a light alchemist. I am aware of the digital era, so I also have a digital camera and the use of digital processing via Adobe's Lightroom, with the time, and mostly related to photographic contests, I will talk about the digital realm of photography.

I hope you will enjoy what I am going to share, and maybe we can enlarge the knowledge of film photography.

PS: I am still setting up a date on the calendar to keep publishing articles.